本文最后更新于:7 个月前
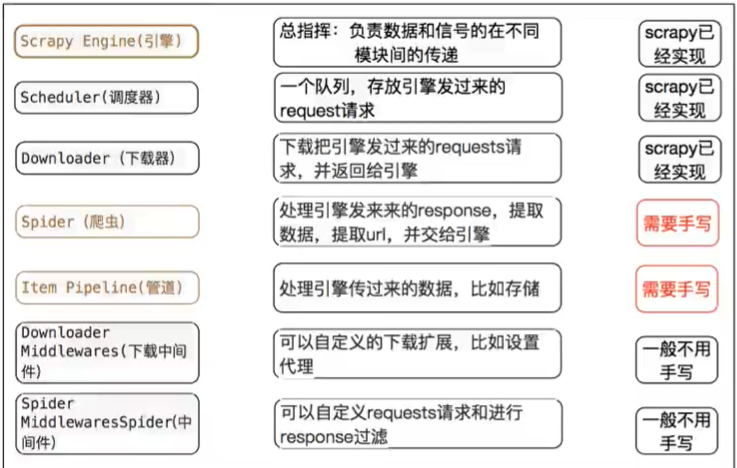
1概念
2学习目标
Scrapy 框架安装创建 Scrapy 项目
创建 Scrapy 爬虫
应用运行 Scrapy
掌握Scrapy 定位以及提取方法
掌握Response 响应对象的常用属性
2.1 Scrapy 框架安装 1 pip install -i https:// pypi.doubanio.com/simple/ scrapy
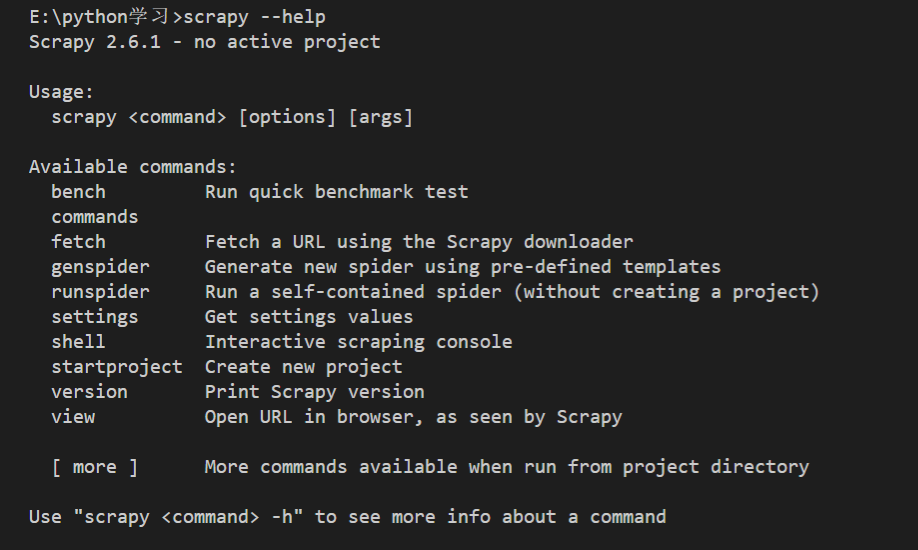
2.2 Scrapy 项目创建 我们先查看一下命令
1
2
3
4
5
6
7
8
9
10
11
12
13
14
15
16
17
18
19
20
21
22
E:\python学习\myScrapyProject\myScrapyProject>scrapy 2.6 .1 - project: myScrapyProjectcommand > [options ] [args ]a spidera URL using the Scrapy downloadernew spider using pre-defined templatesURL (using its spider) and print the resultsa self-contained spider (without creating a project)shell Interactive scraping consolenew projectversion Print Scrapy version URL in browser, as seen by Scrapy
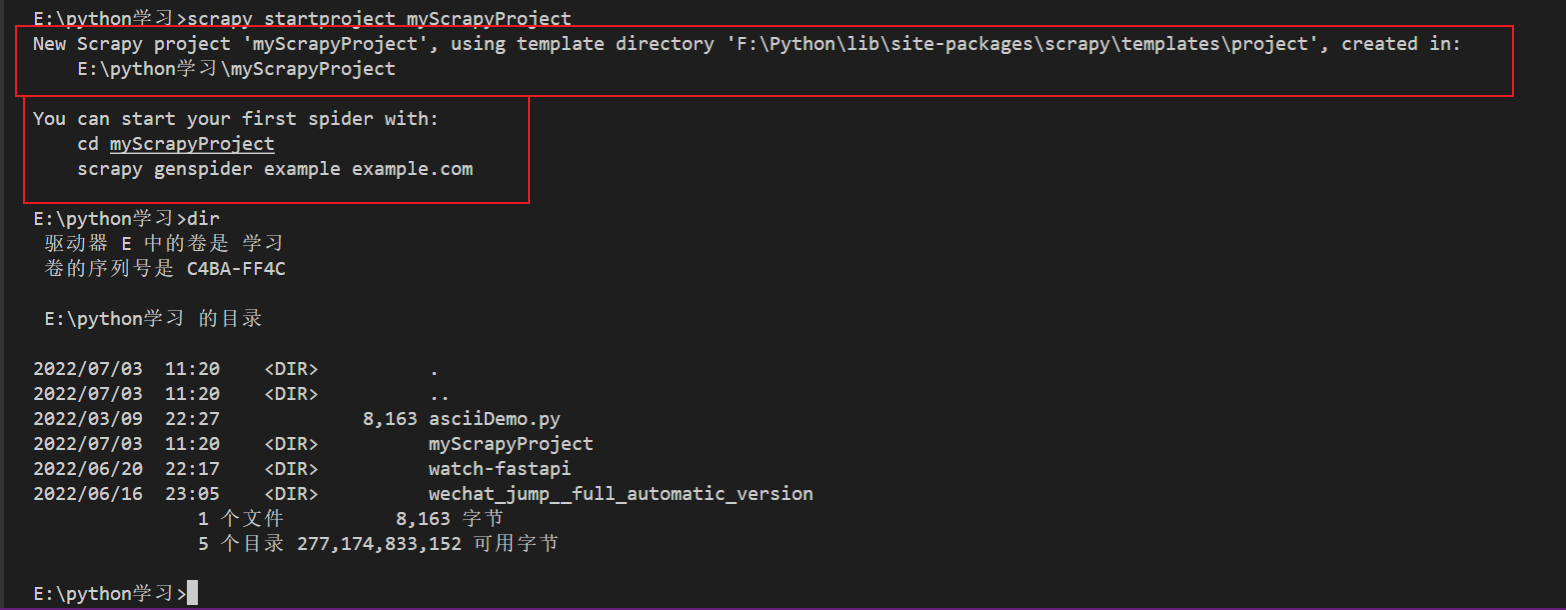
1 scrapy startproject myScrapyProject
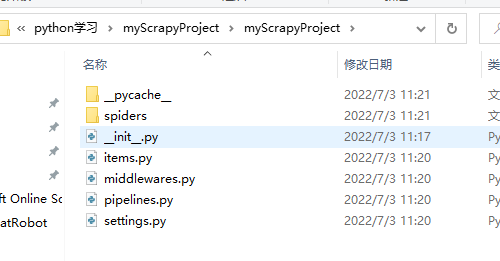
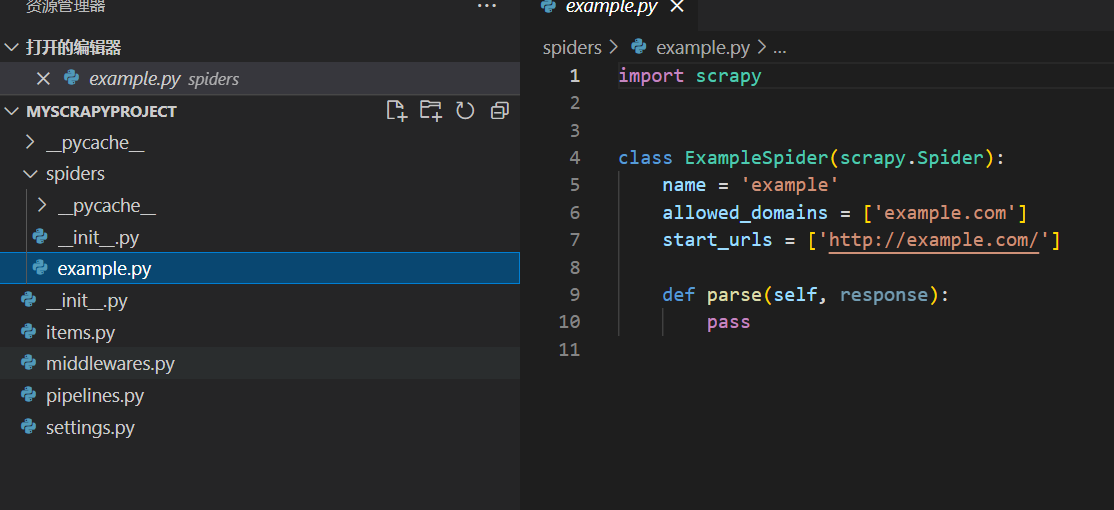
然后我们用 vsCode 打开项目
3创建 Scrapy 爬虫 scrapy genspider 爬虫名称 url
如下:
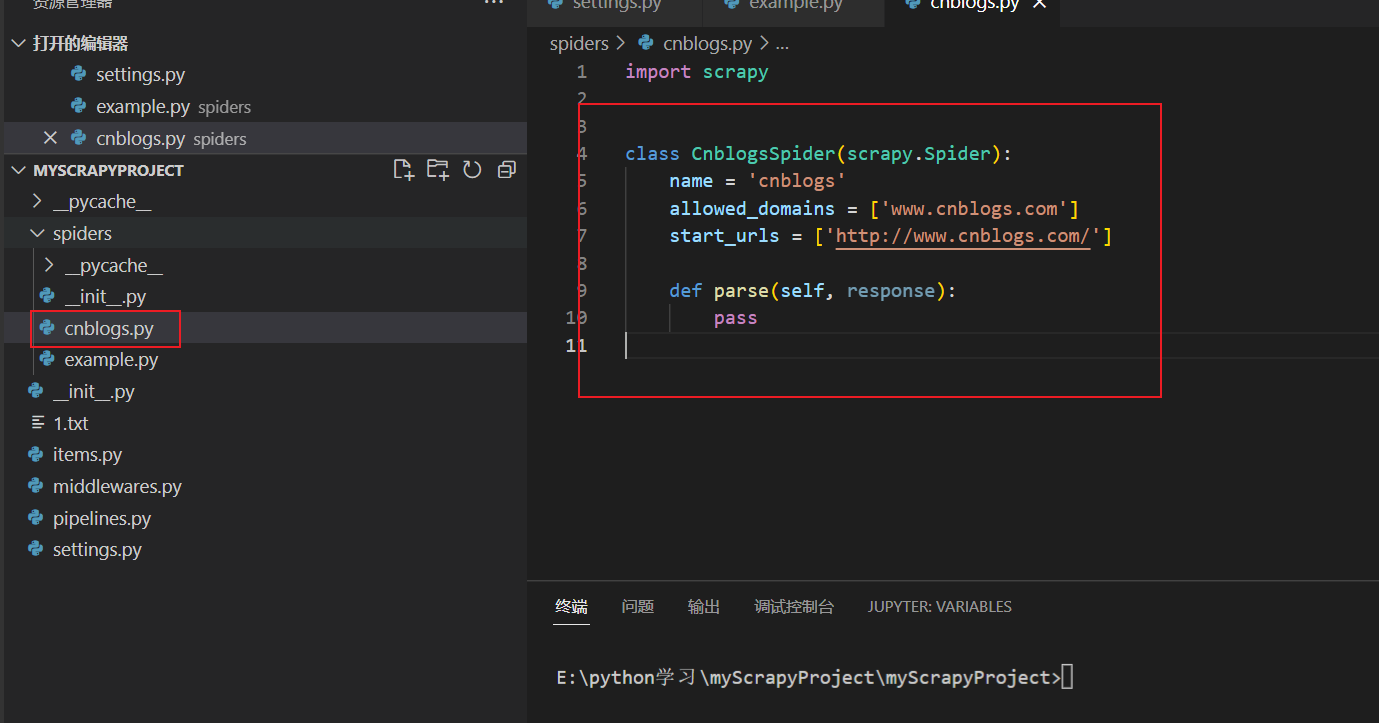
1 scrapy genspider cnblogs https://www.cnblogs.com/
这里创建了一个名字叫做 cnblogs 的爬虫, 初始 url 为 https://www.cnblogs.com/ 没错,这里是去爬博客园的首页文章~~~
1
2
3
E:\python学习\myScrapyProject\myScrapyProject>scrapy genspider cnblogs https://www.cnblogs.com/
4应用运行 Scrapy 执行程序
1 scrapy crawl cnblogs --nolog
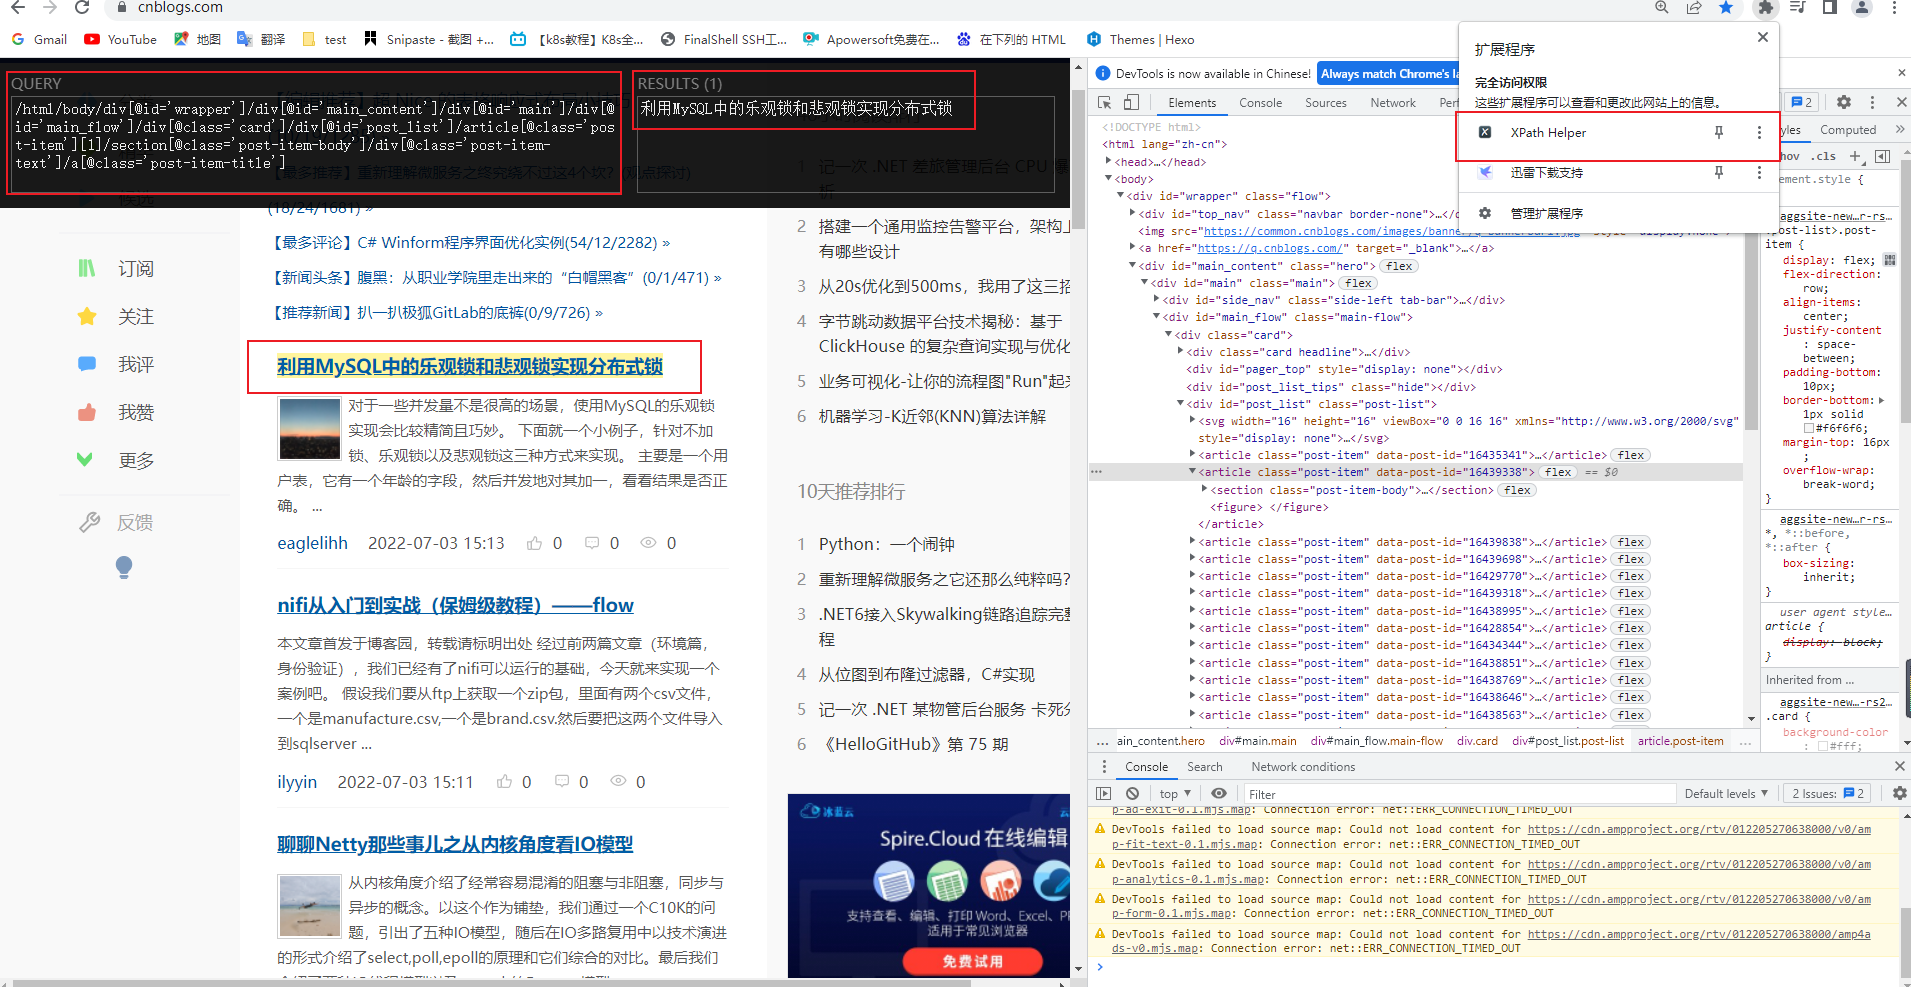
5掌握Scrapy 定位以及提取方法 我们分析一下博客园,这里强烈推荐一个Xpath 帮助插件
大家可以看到,这段xpath 可以获取文章的所有信息,包括 标题,内容,作者,发布时间等等
我们可以编写我们的 cnblogs 爬虫:
1
2
3
4
5
6
7
8
9
10
11
12
13
import scrapyclass CnblogsSpider (scrapy.Spider):'cnblogs' 'www.cnblogs.com' ]'http://www.cnblogs.com/' ]def parse (self, response ):print (response.text)"//div[@id='post_list']/article[@class='post-item']" )
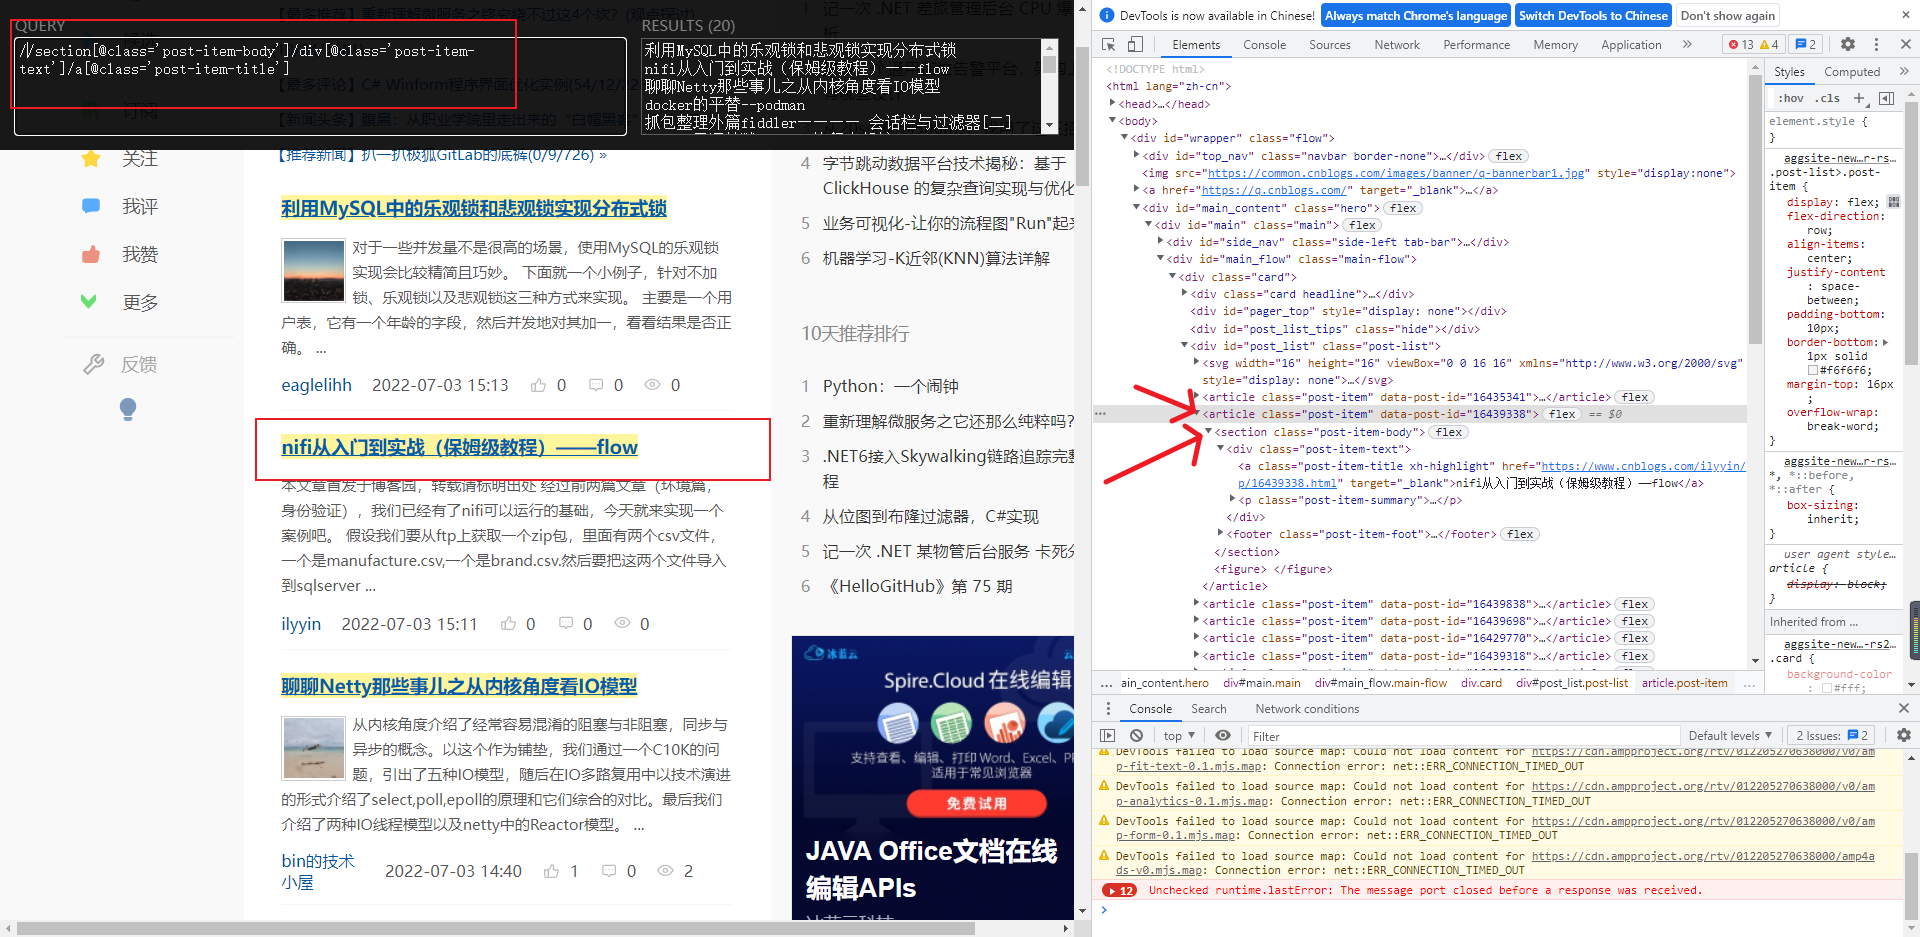
现在我们要获取标题,
1 2 3 4 5 6 7 <article class ="post-item" data-post-id ="16439338" > <section class ="post-item-body" > <div class ="post-item-text" > <a class ="post-item-title xh-highlight" href ="https://www.cnblogs.com/ilyyin/p/16439338.html" target ="_blank" > nifi从入门到实战(保姆级教程)——flow</a > <p class ="post-item-summary" > </p >
我们前面已经拿到了 //div[@id='post_list']/article[@class='post-item'] article[@class='post-item'] 还有个 sectionxpath 应该是这样的://section[@class='post-item-body']/div[@class='post-item-text']/a[@class='post-item-title'] ,单是我们的 cnblogs 爬虫,我们已经获取到了nodeXpath了 所以我们这里就要改成 以当前为根节点./section[@class='post-item-body']/div[@class='post-item-text']/a[@class='post-item-title'] (这里// 表示的是以body 为根节点),所以我们的下面代码就可以写成
1
2
3
4
5
6
7
8
9
10
11
12
13
14
15
16
17
18
19
20
21
22
23
24
25
26
27
28
29
30
31
32
33
34
import scrapyclass CnblogsSpider (scrapy.Spider):'cnblogs' 'www.cnblogs.com' ]'http://www.cnblogs.com/' ]def parse (self, response ):print (response.text)"//div[@id='post_list']/article[@class='post-item']" )for item in nodeXpath:"./section/div[@class='post-item-text']/a[@class='post-item-title']/text()" )"./section/div[@class='post-item-text']/p[@class='post-item-summary']/text()" )"./section/footer[@class='post-item-foot']/a[@class='post-item-author']/span/text()" ) "./section/footer[@class='post-item-foot']/span[@class='post-meta-item']/span/text()" ) "./section/footer[@class='post-item-foot']/a[@class='post-meta-item btn'][1]/span/text()" ) "./section/footer[@class='post-item-foot']/a[@class='post-meta-item btn'][1]/span/text()" ) "./section/footer[@class='post-item-foot']/a[@class='post-meta-item btn'][1]/span/text()" ) print (title)
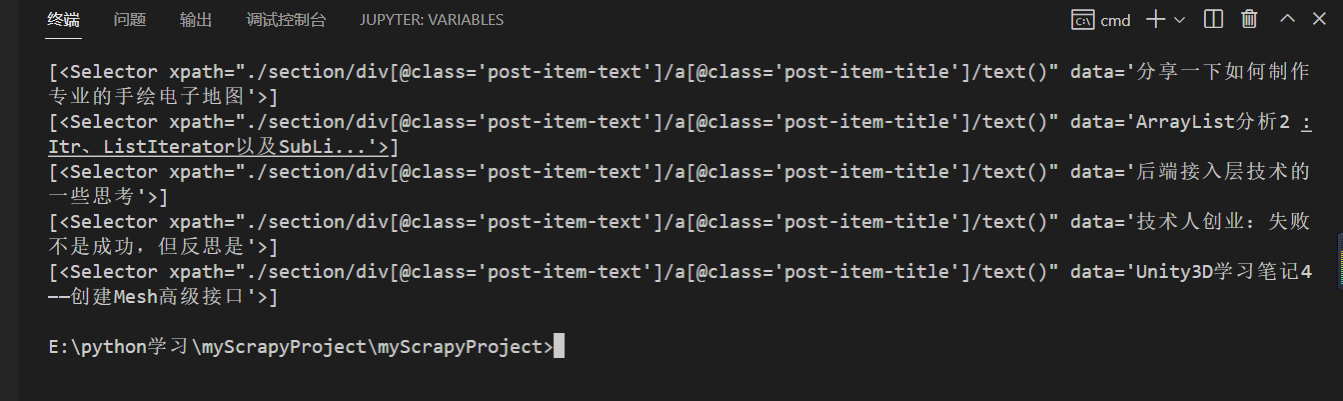
但是我们这里,发现,这里的值怎么是这样的 [<Selector xpath="./section/div[@class='post-item-text']/a[@class='post-item-title']/text()" data='Unity3D学习笔记4——创建Mesh高级接口'>]
1 2 "./section/div[@class='post-item-text']/a[@class='post-item-title']/text()" )[0 ]
1 scrapy crawl cnblogs --nolog
1 <Selector xpath="./section/div[@class='post-item-text']/a[@class='post-item-title ']/text()" data='Unity3D学习笔记4 ——创建Mesh高级接口'>
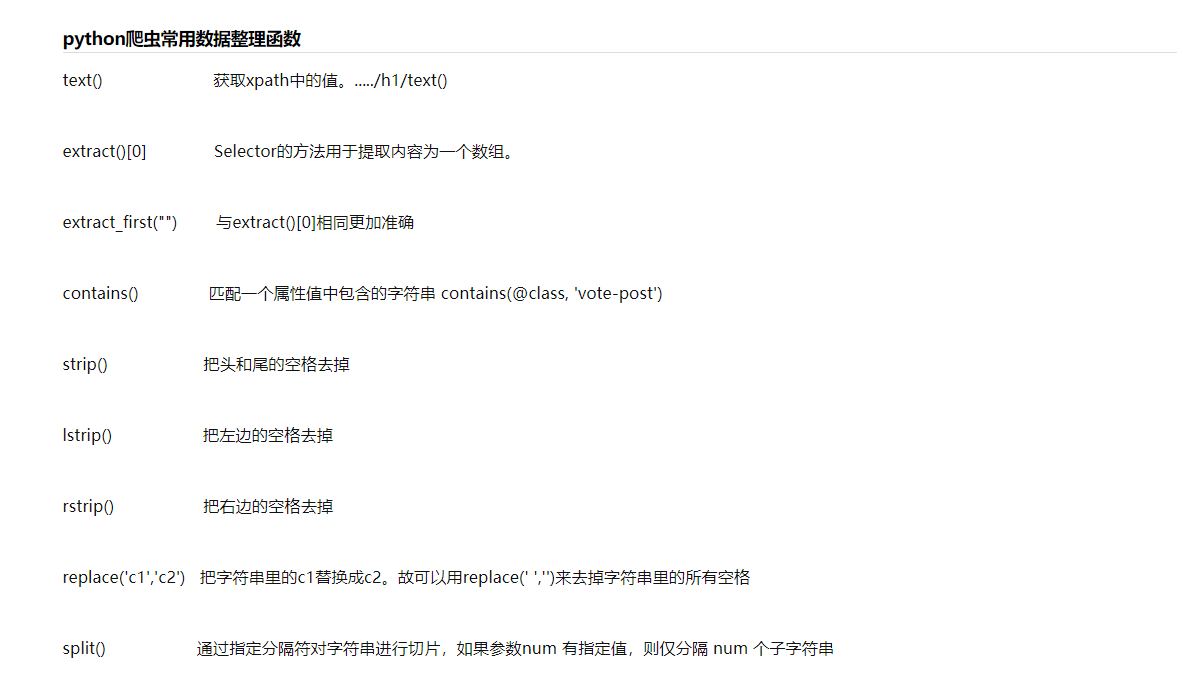
6掌握Response 响应对象的常用属性 发现还不是咱们想要的, 这里要介绍两个关键词
extract()
extract() 与extract_first()
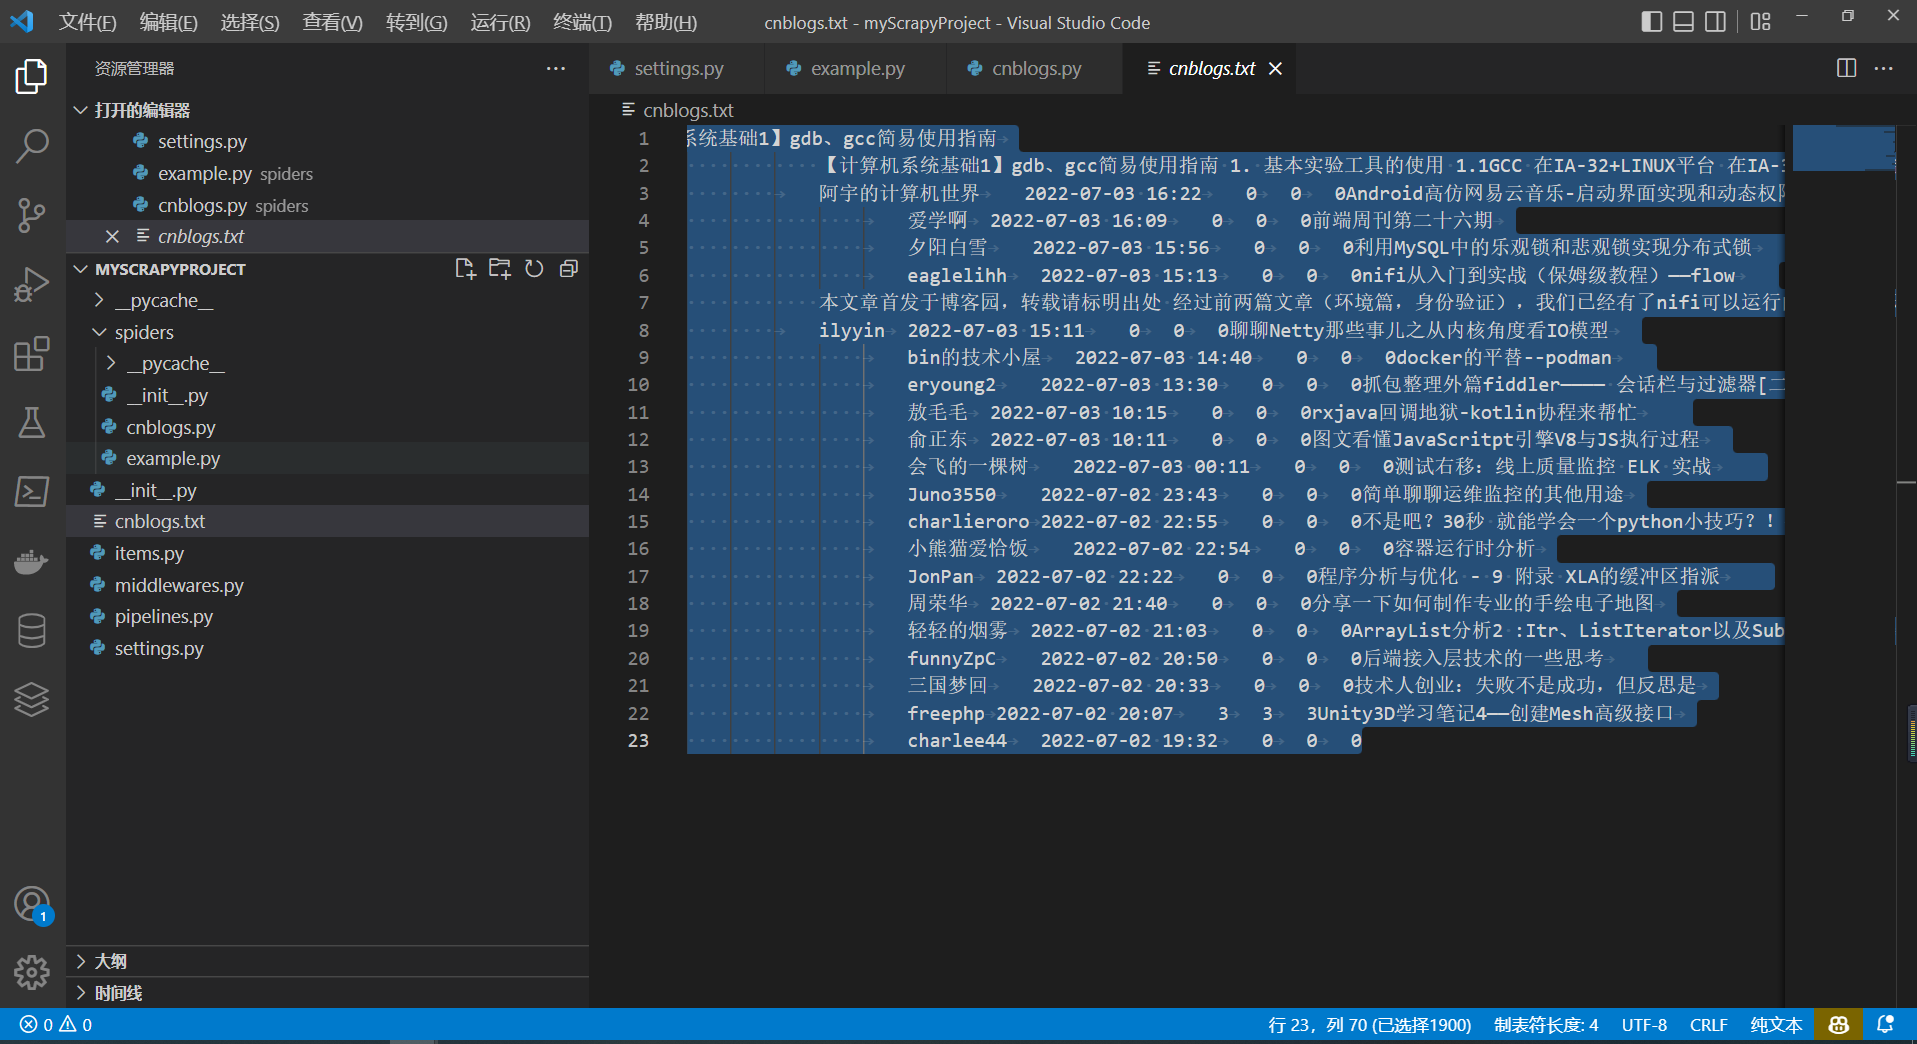
7最终爬虫效果 7.1代码 1 2 3 4 5 6 7 8 9 10 11 12 13 14 15 16 17 18 19 20 21 22 23 24 25 26 27 28 29 30 31 32 33 34 35 36 37 38 import scrapyclass CnblogsSpider (scrapy.Spider):'cnblogs' 'www.cnblogs.com' ]'http://www.cnblogs.com/' ]def parse (self, response ):print (response.text)"//div[@id='post_list']/article[@class='post-item']" )for item in nodeXpath:"./section/div[@class='post-item-text']/a[@class='post-item-title']/text()" )[0 ].extract()"./section/div[@class='post-item-text']/a[@class='post-item-title']/text()" ).extract_first()"./section/div[@class='post-item-text']/p[@class='post-item-summary']/text()" ).extract_first()"./section/footer[@class='post-item-foot']/a[@class='post-item-author']/span/text()" ) .extract_first()"./section/footer[@class='post-item-foot']/span[@class='post-meta-item']/span/text()" ) .extract_first()"./section/footer[@class='post-item-foot']/a[@class='post-meta-item btn'][1]/span/text()" ) .extract_first()"./section/footer[@class='post-item-foot']/a[@class='post-meta-item btn'][1]/span/text()" ) .extract_first()"./section/footer[@class='post-item-foot']/a[@class='post-meta-item btn'][1]/span/text()" ) .extract_first()with open (file="cnblogs.txt" ,mode="a+" ,encoding="utf-8" )as f:f"{article_title} \t{article_summary} \t{article_autuor} \t{article_time} \t{article_up} \t{article_comment} \t{article_browse} " )
7.2 效果 1 2 3 4 5 6 7 8 9 10 11 12 13 14 15 16 17 18 19 20 21 22 23 24 【计算机系统基础1】gdb、gcc简易使用指南